Azure AD Connect - Step by Step
Okay – Now that you’ve had some time to let the previous blogs sink in a minute. Let us take a moment and break down this monstrosity that is Azure AD Connect.
Why? It’s simple. A majority of organizations running in today’s enterprises are not simply migrating 100% of all user/group object data into the cloud. They’re still wanting to maintain some presence of Active Directory Domain Services (i.e. AD DS on-prem) so they can still support authentication to other on-prem based applications and services. This means you NEED a means to sync identities between Azure AD and AD DS. Azure AD Connect is the Microsoft solution that will get you there and is also the solution covered extensively on the MS-100: Microsoft 365 Identity and Services examination.
Let’s break it down!
Read the Roadmap!
There’s a great article on how to get started on Microsoft’s site that I highly recommend you review if this is your first-time diving into Azure AD Connect. This breaks down hardware requirements for the synchronization server, settings for the synchronization wizard, how to upgrade from existing sync services like DirSync, etc. Furthermore, it breaks down the steps in a decent sequential order. If you’re studying for the exam, this is a must for you to review and study.
Let’s prepare that environment for Azure AD Connect
Now that we’ve read over the roadmap for details, it’s highly recommended you use a tool like IdFix to help identify any potential errors or duplicate object entries before you begin to synchronize any parts of your identity to Azure AD.
For the on-prem AD environment, there are some other equally important steps like verifying schema and forest functional levels. Most orgs likely have this requirement met as the levels have to bee set to Windows Server 2003 or later (it’s been a while since I’ve seen a schema level/forest functional level set that old) – Nonetheless, if you’re still on 2000, you’ll want to ensure the upgrades are completed.
Furthermore, if you want to use other capabilities like password writeback, you’ll need to ensure you have some domain controllers running 2008 R2 or later. You also shouldn’t have any read-only domain controllers as the domain controller used by Azure AD must be writable.
As we start to dive into the Azure AD Connect Server itself, there are a decent listing of pre-requisites that you will need to consider such as:
1. Server must be a domain member and running Windows Server 2012 or later.
2. Full version of Windows Server must be installed (i.e. use the GUI) – Core isn’t supported.
3. Along these same lines, you can’t use Small Business Server (SBS) or previous editions of Windows Server Essentials (2019 is supported but older versions are not).
A complete listing can be found in the pre-requisite link above.
What about security??? Great question – Securing the Azure AD Connect server is vital. I mean, we’re synchronizing some pretty important data. As such, we need to treat the server as a Tier 0 object (as we follow the Active Directory administrative tiering models).
Azure AD Connect also requires a database – I believe I mentioned this in my previous blog as well. I won’t beat that issue up anymore than it already has as my previous blog breaks that down a little bit…
Anyway, now that we have our prerequisites and security concerns addressed…

Installing and Configuring Azure AD Connect
It starts simply enough – Downloading Azure AD Connect.
The next step is not so simple. If you read my blog on the different type of authentication options (i.e. Pass-Through Authentication, Password Hash Synchronization, etc.), you need to make a decision here.
When we get into the installation method options of Azure AD Connect, we really have two options:
Express Settings
Custom Installation
Express settings – are for those environments where you’re synchronizing with a single-forest topology and are using Password Hash Synchronization for your authentication option. The reason for this setting is that these options are the most commonly used scenarios for organizations, and it minimizes the clicks/settings that require tweaking to get the synchronization started. Anything else – You’ll need to specify a custom installation.
Before you get to dive into custom settings, the installation wizard does a quick check to ensure no other synchronization services are running and you can then specify any existing SQL Servers, service accounts, or synchronization groups.
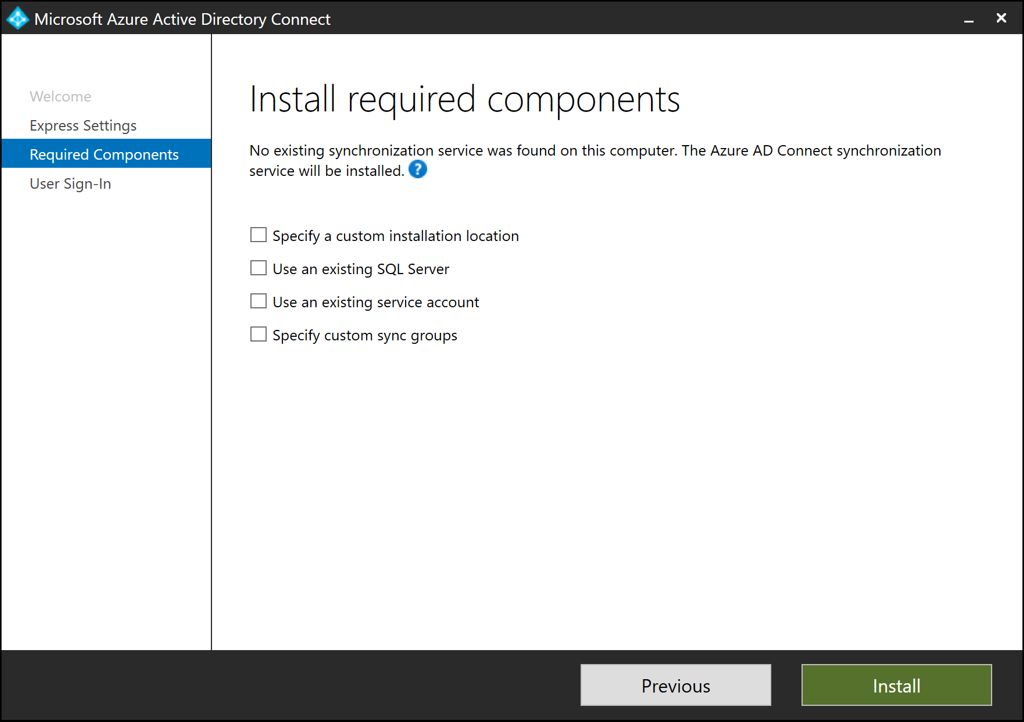
Figure 1 – Azure AD Connect Wizard – Install required components
Source: Install required components
Now once we get past that initial step, we get to dive into more specific areas of focus around the authentication method (or sign on method). It’s here we get to determine Password Hash Synchronization, Pass-Through Authentication, or Federation (i.e. using either Active Directory Federation Services (ADFS), or a 3rd party like PingFederate). You can also specify whether you wish to enable single sign-on here as well.
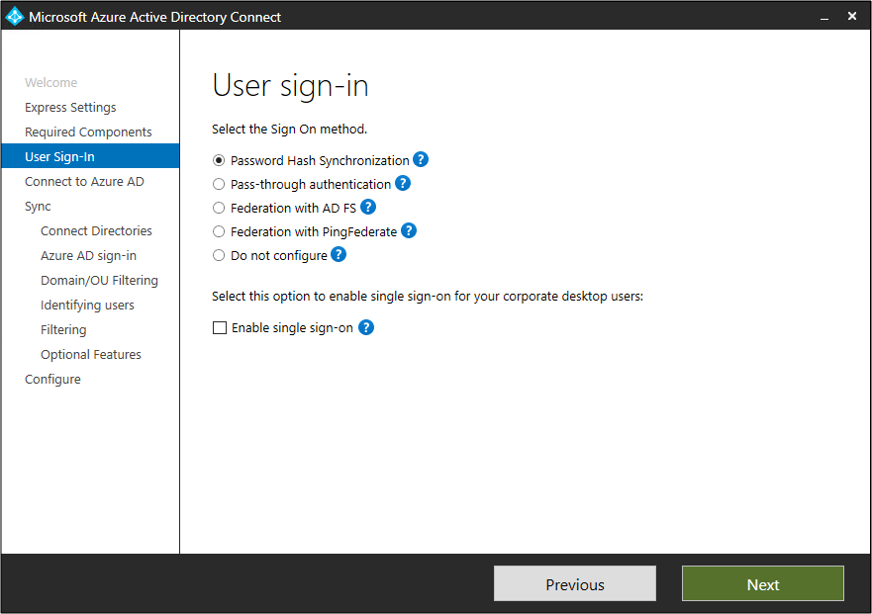
Figure 2 – Azure AD Connect Wizard – User sign-in
Source: User sign-in
Once we get the pleasantries of the sign-in options out of the way, we now get to the good stuff… Okay maybe not Thanksgiving Dinner at Grandma’s good but still... Anyway, I’m talking about connecting to Azure AD. Now remember, we’re running this wizard in a Server on-prem that’s already a member of the on-prem Active Directory. So, we’re connecting to Azure AD to start the sync process. Not the other way around…
Now you may be asking yourself, what permissions do I need to do this? Well that’s simple. Global Administrator. You need to ensure you’re a global admin. Furthermore, if you’re going to use Federation with ADFS, you don’t want to use an account on the same domain you plan to enable for federation. A good way around this is to create that global admin account on the .onmicrosoft.com domain to facilitate this.
Now, I’m an old school Active Directory admin type and I’m a huge fan of service accounts for specific uses. The great thing about the wizard here is that when you specify that global admin credentials, the wizard will create a service account in Azure AD for the synchronization use. You won’t have to create one.
One other thing to note about this global admin account – If you’ve enabled it for MFA, you’ll need to authenticate using that method (i.e. mobile phone, authenticator app, etc.) to proceed.

Figure 3 – Azure AD Connect Wizard – Connect to Azure AD
Source: Connect to Azure AD
Once we’ve provided the accounts necessary it’s time to identify what we’re going to sync…
Before we do that, let’s integrate the on-prem Forest first. This requires us to add the on-prem directory and specify the Enterprise Admin account for the forest. Quick recap – if you’re asking yourself, why not the domain admin? Remember we’re not synchronizing just the domain; we’re synchronizing the forest. As such, you’d need to specify the Enterprise Admin account of the forest to proceed here. Luckily for us, the wizard specifies this pretty clearly.
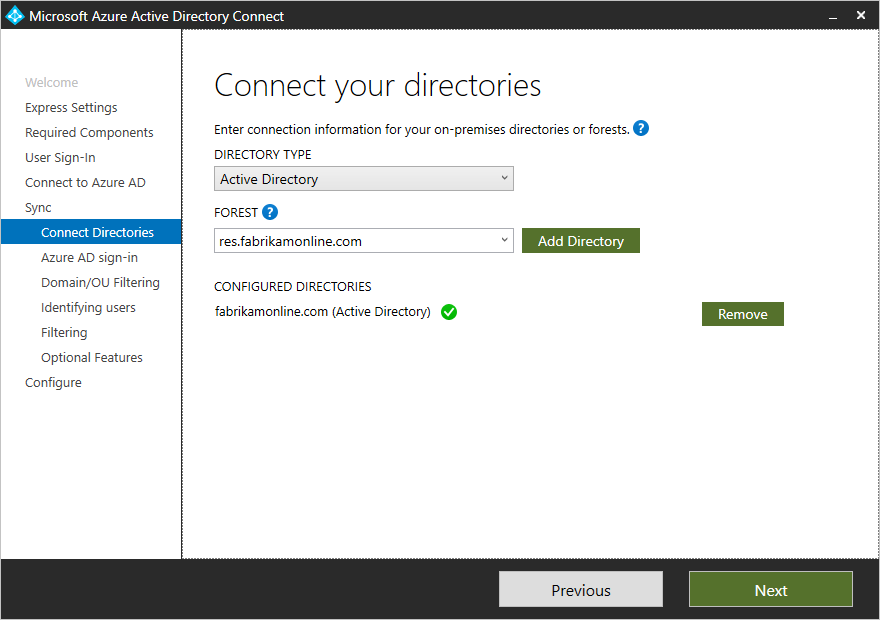
Figure 4 – Azure AD Connect Wizard – Connect your directories
Source: Connect your directories
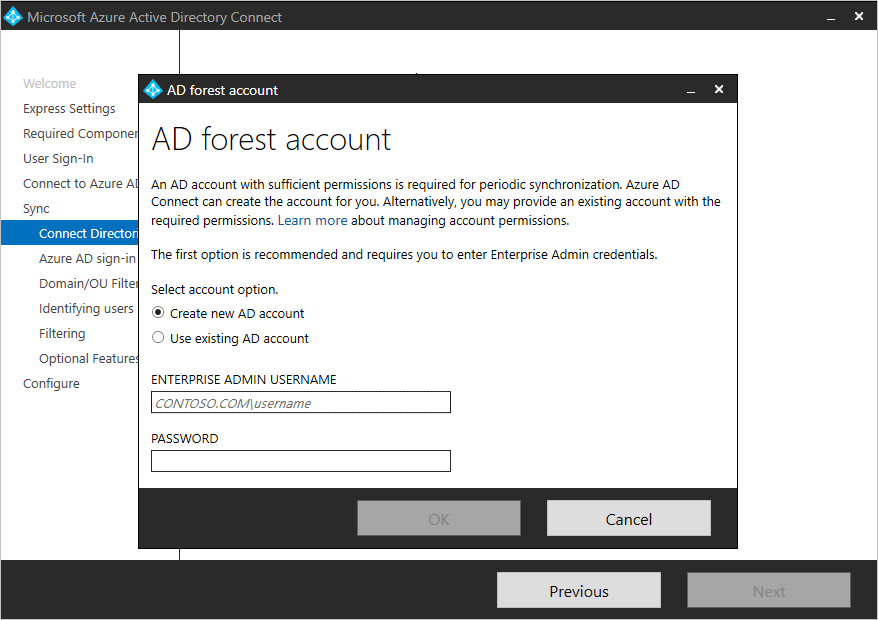
Figure 5 – Azure AD Connect Wizard – AD forest account
Source: Connect your directories
Now as you can see above, you can create a new account or use an existing account. If you opt to create a new account, you’ll be asked to provide the enterprise admin credentials to allow the wizard to provision a new account in Active Directory Directory Services with the appropriate permissions.
If you specify an existing account, we’ll that’s easy. Just specify the FQDN or NETBIOS name of the account (i.e. contoso.com\administrator or CONTOSO\Administrator) to proceed. One thing to note about using an existing account is that it only needs default read permissions. However, some scenarios may require additional permissions. For those details, I recommend reading up on Azure AD Connect Accounts and Permissions for more information.
This next phase is all about verification of the domains we’ve just connected. This is important because the UserPrincipalName (or UPN as its commonly referred to) attribute in Active Directory is the attribute that users will use when they sign-in to services like Azure AD and Office 365. Therefore, the domain (or UPN-suffix) should be verified before we synchronize any objects into Azure AD.
If you’re using Pass Through Authentication, you need to have at least one verified domain in order to proceed through the remaining steps in the installation wizard.

Figure 6 – Azure AD Connect Wizard – Azure AD sign-in configuration
Source: Azure AD sign-in configuration
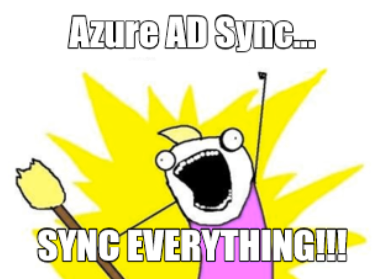
Remember my earlier meme – Sync everything??? Well by default this is the behavior when we get to the next phase of the wizard. When we get into Domain and Organizational Unit (OU) filtering, we can specify what we DO NOT want to synchronize to Azure AD.
This step is pretty straight forward but if you have concerns about which domains and or OUs you are not wanting to synchronize, it’s not a bad idea to review the domain-based filtering and OU-based filtering articles on Microsoft’s doc library before you make any changes.
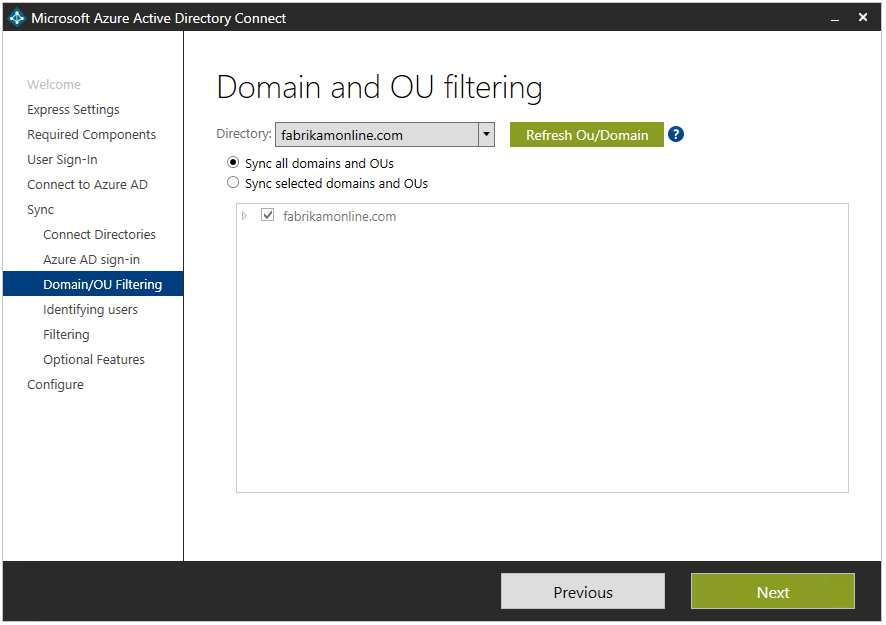
Figure 7 – Azure AD Connect Wizard – Domain and OU filtering
Source: Domain and OU filtering
Oh, I almost forgot… If for whatever reason you have firewalls or other network security appliances between domains, you may want to verify that you can communicate with the domains. Why? If you try to specify a domain that is “unreachable” that may be why. There may be legitimate reasons a domain is unreachable but just verify that to be safe.
The next step helps define how we should identify users in Active Directory and how we want them represented in Azure AD. In some cases, you may have a user with multiple representations across multiple domains (i.e. an enterprise admin). You may also have the same thing for B2B, guest accounts, or mail enabled contacts in Active Directory.
Simply put, you need to uniquely identify your users to avoid duplicate entries in Azure AD. This step helps you define that and how you’d like to identify those users.

Figure 8 – Azure AD Connect Wizard – Uniquely identifying your users
Source: Uniquely identifying your users
Here your options are pretty straight forward:
Users are represented once across all forests – all users are individual objects in Azure AD.
Mail attribute – This option will join users and contacts if their mail attribute has the same value in different forests. If you’ve used services like GALSync to create contacts, you’ll want to specify this option.
ObjectSID and msExchangeMasterAccountSID/msRTCSIP-OriginatorSid – This option joins an enabled user in an account forest with a disabled user in a resource forest. In the Exchange realm of taxonomy this is known simply as a linked mailbox. This option can also be leveraged if you only use Lync or Skype for Business and Exchange is not present in the forest.
SAMAccountName and MailNickName – This leverages those attributes where its expected that the sign-in ID for the user can be found.
Specific Attributes – You can select and define your own attribute. The only limitation here is this has been to be a searchable attribute across the Active Directory metaverse.
As we go into the next steps of this wizard, we start to look at specific filtering options that are available. Some examples of this would be group-based filtering. This allows us to sync only a smaller subset of objects for a specific use (i.e. pilot, proof of concept, test, etc.). The most important thing to note is this really is meant and intended for pilot type deployments and not meant for large scale production deployments.

Figure 9 – Azure AD Connect Wizard – Filter users and devices
Source: Filter users and devices

We’re almost done with the guide… I know this is a longer blog but these steps are detailed and the importance of your identity properly syncing to Azure AD hangs all other cloud authentication in the balance so stay with me…
As we go into the next step of the wizard, we talk about the use of optional features. Here we can add options like Exchange hybrid deployment, Password writeback, Group writeback, etc. to the mix.
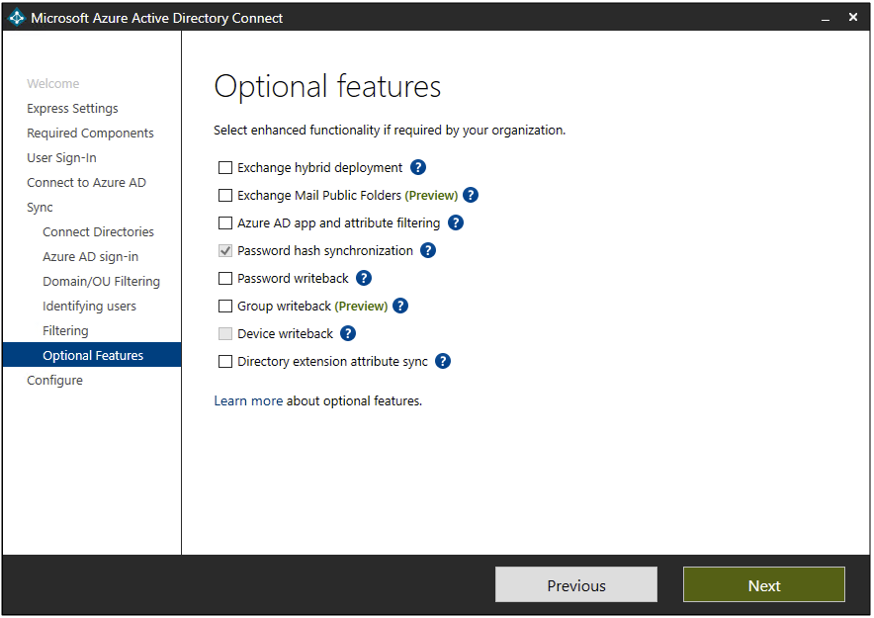
Figure 10 – Azure AD Connect Wizard – Optional features
Source: Optional features
The list of features each has their own description if you click the source link above. If you go through the wizard, you’ll see the ? next to each item. This will also provide you with that description of each feature as well. I won’t belabor the details of each feature in this blog but if you want to add additional features, you will simply set that and it will allow you to provision/enable that feature in the wizard directly as a next step.
For example, if you select Azure AD app and attribute filtering, you’ll get a screen shot like this:
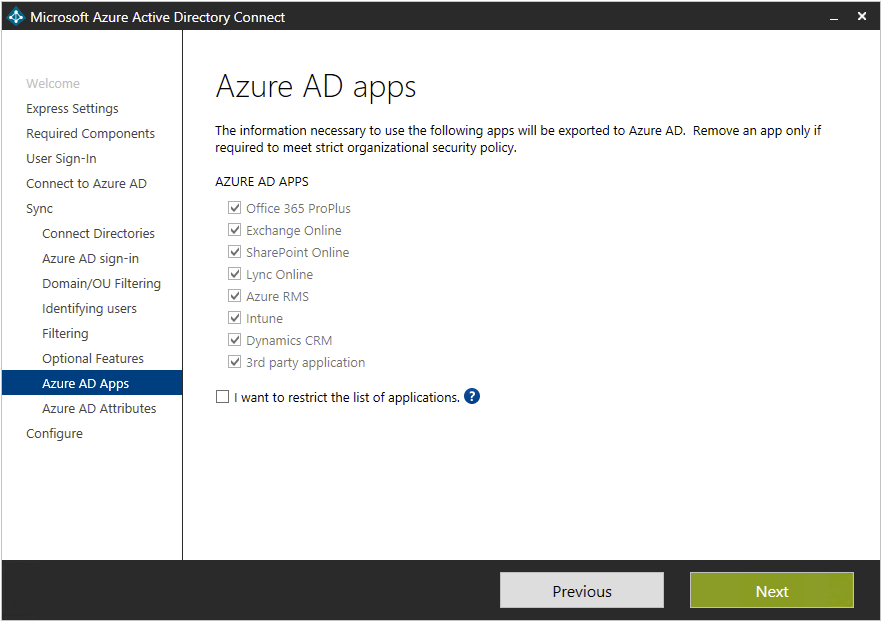
Figure 11 – Azure AD Connect Wizard – Azure AD apps
Source: Azure AD app and attribute filtering
In this step, you’ll see that you can limit which apps and attributes you want to synchronize to Azure AD. Depending on what apps you select you’ll see a list of which Azure AD Attributes will be synchronized.
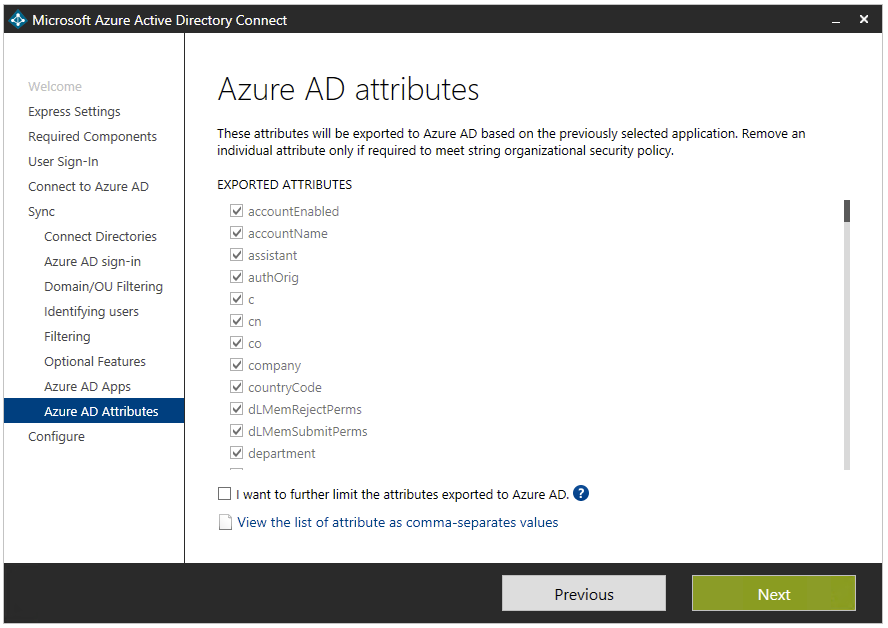
Figure 12 – Azure AD Connect Wizard – Azure AD attributes
Source: Azure AD app and attribute filtering
However, it’s important to note that if you remove additional attributes, you could limit and/or break app functionality. As such, it’s a good recommendation to review the attributes synchronized page on the Microsoft doc library.
I’m adding this step to the blog too because I’m pretty sure you’ll get a question like this on the MS-100 examination.
If you’re specifying the Directory Extension attribute sync in the optional features step, you’ll want to know what this means as well. The intent here is for you to be able to extend the schema in Azure AD with the custom attributes and settings you have in your on-prem Active Directory. This is what this step in the wizard does.
When you’re looking at these extensions there’s a key thing you should note – these attributes are case sensitive.
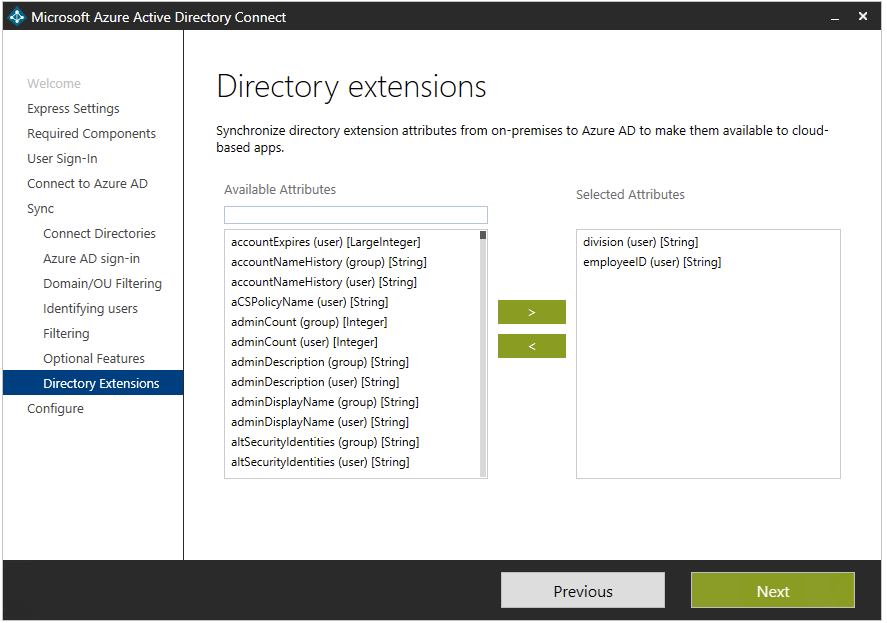
Figure 13 – Azure AD Connect Wizard – Directory extensions
Source: Directory Extension attribute sync
Click the link if you want to learn more about the Directory extensions.
One last thing before we go into post-installation tasks – the enablement of Single Sign-On (SSO)
Regardless of if you’re using password synchronization or pass-through authentication, you simply need to ensure these two steps are completed:
1. Create the necessary computer object account in your on-prem Active Directory
2. Configure the intranet zone of the client machines to support SSO
I won’t incorporate any screen shots here because this is a shorter step but the details here are found by clicking the above links for the two steps mentioned previously.
One other thing – (I have a lot of one other things in this blog but this one’s important) 😊 – Federation. This blog doesn’t dive deep into the ADFS side of the house. However, if you want to learn, more about Configuring Federation with ADFS click here – Configuring federation with ADFS.
Once you hit the final steps in the wizard, you’ll simply need to configure and verify. For the configure step, you simply need to do check whether or not you wish to start the synchronization process as soon as the wizard completes and if you wish to enable Staging Mode. Staging mode has some other steps that we will save for another blog. For now, we’ll synchronize (as we likely would if this were our first time running through the wizard) and proceed to the verification steps.
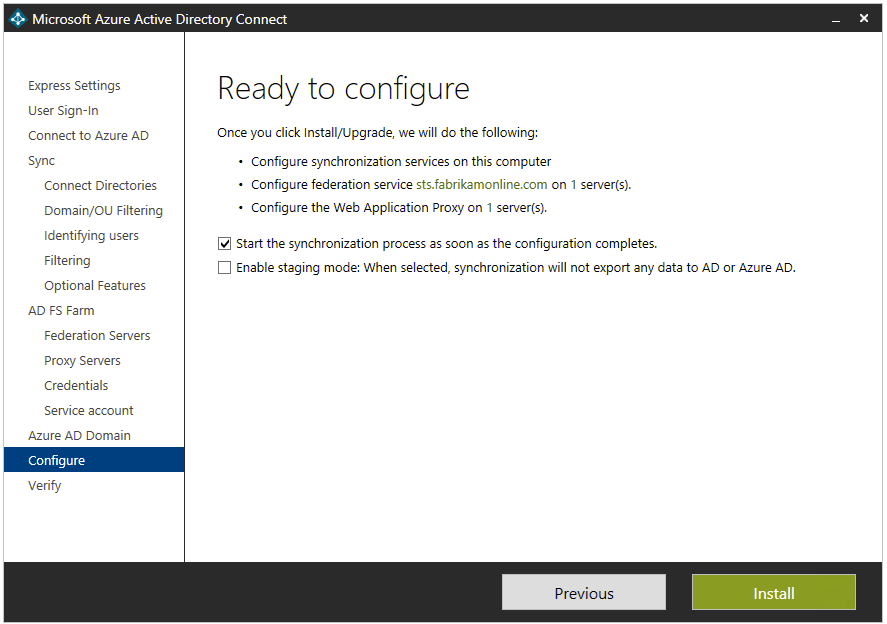
Figure 14 – Azure AD Connect Wizard – Ready to configure
Source: Configure and verify pages
Assuming you don’t have federation configured (if you do you’ll be asked to verify the FQDN of the federation domain), you’ll be good to go and get the Installation Complete step in the process.
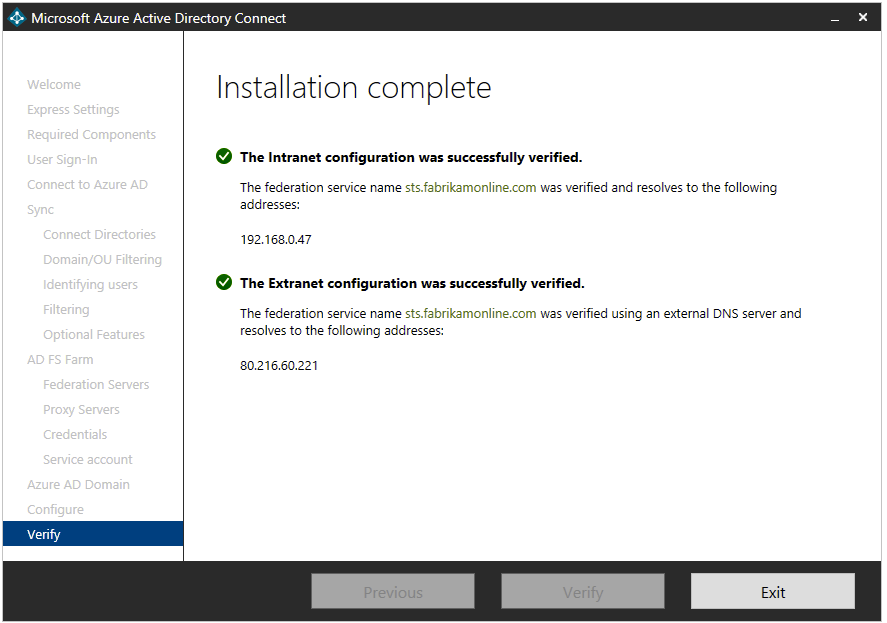
Figure 15 – Azure AD Connect Wizard – Installation Complete
Source: Configure and verify pages
If you experience errors or need to troubleshoot steps in the wizard, I’d recommend you dig into those issues on this page.

Otherwise – YOU DID IT! You’ve successfully gone through the Azure AD Connect installation wizard.
As far as next steps are concerned, there is a document that breaks down the specific Next steps and how to manage Azure AD Connect. However, some of these steps are basic and straight forward.
To summarize here’s a few steps you want to consider:
1. Add an additional sync admin
2. Assign your licenses for Azure AD Premium and Enterprise Mobility Suite users
3. Check and Verify the scheduled synchronization tasks are running and have completed
You can also configure and start a scheduled synchronization task in Azure AD Connect as well (select Customize Synchronization Options)
There are other tasks you can configure as well (i.e. device options, changing user sign-in, manage federation, configure staging mode, etc.)
As I mentioned before, we’ll do a deep dive on Staging Mode in my next blog.
If you want to fully engulf yourself in the subject matter that will help you study and prep for the MS-100 examination, I highly recommend that you take a look at my course with Skylines Academy MS-100 Certification Course: M365 Identity and Services. In that course, you’ll dive deep into 18 different modules, demonstrations, and topics that are covered on the examination (to include what we just included here in this blog).
Should you have any questions, please don’t hesitate to reach out to Skylines Academy about your study needs for your next Microsoft examination. Thank you again for taking the time in reading this lengthy blog and stay healthy out there!!!

About the Author
David Hood is a Technical Account Manager for Microsoft Corporation where he supports enterprise education customers across a 4 state territory. Prior to that he spent the past 8 years as a Solutions/Enterprise architect supporting and designing solutions for regulated industries like the utility industry and the Department of Defense Intelligence Community. David also teaches Information Technology curriculum at Lindenwood University as an Adjunct Instructor. He also develops coursework for the University when needed as well. . Feel free to connect with David on LinkedIn or Twitter where he shares information regarding technology and education.